Table of Contents:
Is your shed too hot in July and too cold in January? This beginner’s guide shows you how to insulate it without turning it into a damp, stuffy box. No special skills required.
Where You Should Add Insulation and Why
Insulation works best as a system to slow heat loss or gain, and air sealing for blocking drafts. Skip the sealing and cool air will sneak in through cracks, even with insulation in place.
Shed Wall
Walls are a great place to start. They’re easy to access, plus you’ll notice the difference right away. They also cut noise if you’re running tools. If you’re finishing the inside, think ahead — shelves, hooks, pegboards, ceiling racks, cabinets? If yes, plan blocking or choose a wall finish that lets you fasten anywhere.
Shed Roof
The roof is where you’ll feel temperature swings first. In summer, hot air collects up high fast, especially in cabin sheds with pitched roofs. In winter, warm air rises and slips out through the roof if it isn’t insulated. Insulating the interior walls and roof is what makes a shed feel closer to a conditioned space, but only if you keep good airflow above the insulation. If your shed already has vents, don’t bury them. The goal is to vent the space above the insulation so moisture can move out instead of soaking into the framing.
Shed Floor
If there’s open air under your storage shed, the floor can stay chilly no matter how nice the walls are. Fix drainage first so moisture accumulation doesn’t turn into mildew later. For the best coverage, install insulation in the walls, roof, and floor for maximum effectiveness. If your budget allows it, then go for it. It won’t hurt anything.
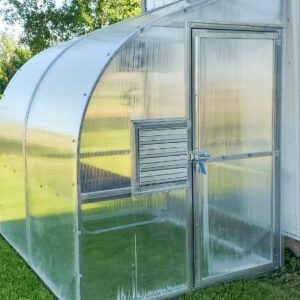
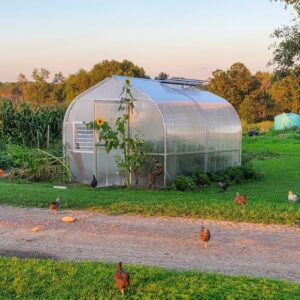
Note: A sunny side greenhouse shed doesn’t need full insulation like a storage shed or workshop. If you insulate at all, do it strategically. Focus on heat loss areas, keep sun-facing surfaces clear, and make sure ventilation can release extra heat when the sun is strong.
How to Choose the Right Insulation for Your Shed
Start with how you’ll use the shed and what you want to spend. Basic storage can stay simple, but a workshop needs more comfort. If you’re turning it into a hangout or office, treat it like a small room and plan for air sealing, ventilation, and safe heating.
If you’re searching for Wisconsin sheds, you should know that the cold seasons plus humidity swings make moisture control just as important as insulation. But if you’re in a warmer area, you’re mostly trying to keep the shed from turning into an oven.
Quick Definition: R-Value in Shed and Roof Insulation
A good starting point is knowing what the R-value of insulation is and what it means. R-value measures resistance to heat transfer. The U.S. Department of Energy says, “the higher the R-value, the greater the insulating effectiveness.” ENERGY STAR’s chart helps you choose levels that are cost-effective for your climate.
Higher R value usually means better insulation, but you need the right thickness and installation. Many shed walls land around R-13 to R-23, while ceilings often need more, around R-30 to R-49, because heat rises.
Spray Foam Insulation
Spray foam is great for air sealing, especially around odd framing and cracks. It can stop drafts that come from gaps you can’t even see. The downside is cost and mess. It’s harder to DIY neatly, so many people hire it out, especially for roof cavities. Professional spray foam insulation can be around $2,300 for sheds, based on the size.
Mineral Wool Batt Insulation
Mineral wool batts handle moisture well and add a sound barrier. They cut cleanly and stay in place, which makes them beginner-friendly. If you leave gaps, air will sneak around the batts and you’ll feel it near outlets and corners.
Fiberglass Insulation
Fiberglass batts are easy to find at big box stores and can be budget-friendly. For example, in 2025, fiberglass insulation costs $0.60 per square foot for R-13 insulation.
Wear a dust mask, eye protection, and gloves because fiberglass can itch and the tiny fibers can irritate your skin, eyes, and lungs while you’re cutting and fitting it. Fiberglass works best when it stays fluffy and dry because it traps air. That trapped air is what slows heat. When it gets wet or smashed down, it loses a lot of its insulating power. If your shed has moisture issues, fix those first.
Pro tip:Add ventilation to your shed if you are insulating it with fiberglass or Rockwool insulation.
Rigid Foam Board Insulation
Rigid foam board is lightweight and can deliver a lot of R-value in a thin layer. It’s also handy on floors, where moisture resistance matters. Tape all seams and seal edges to limit air movement, especially before you cover it with drywall or plywood.
Loose-Fill Insulation (Ceiling Only)
Loose-fill insulation is exactly what it sounds like — loose insulation materials used to fill the space below a roof deck. It works best when it’s put above a finished ceiling. You also need a vented air space above it. If you don’t have a ceiling, skip loose-fill and use something designed for open framing.
Your cost comes down to one big choice: DIY or hire it out. DIY can save money, but it also takes longer than most people want to put into it. As a rough ballpark, insulating a 16′ x 26′ shed can land around $1,500 to $1,600 in materials, depending on the insulation you pick and how much of the shed you insulate.
Step-By-Step Guide to Installing Shed Insulation and Materials Needed
You don’t need a huge tool kit, but you do need accuracy. Grab a tape measure, utility knife, straight edge, staple gun, staples, tuck tape, caulk or foam to seal gaps, and safety gear like gloves and a dust mask are a must.
Before you start installing insulation, figure out any ventilation requirements. It’s way easier to add soffit, ridge, or gable vents while the framing is still open, and you don’t want to insulate a roof cavity and realize you blocked airflow. Once venting is set, the rest of the insulation work goes a lot smoother. You’ll also want to go ahead and seal any gaps you’ve found and let that dry first.
STEP 1: Add Ventilation to Your Shed (Optional)
Decide whether you need vents based on how you’ll use the shed. Add soffit vents with a higher exit vent (gable or ridge vents) if you’re going to seal and insulate. Install rafter vents (baffles) in the roof cavity so insulation can’t block airflow.
Does an insulated shed need ventilation? Ventilation is a good idea anytime the shed is used like a workspace or holds anything that creates dust, fumes, or smells. That includes sanding or painting, running gas-powered tools or a generator, storing fuel or chemicals, starting an ATV or motorcycle inside, or having pets or livestock in the shed.
Vents also help once you insulate and seal air gaps because a tighter shed can get hot and stuffy on sunny days, and wet gear or snow-covered items take longer to dry. Ventilation is less important when the shed isn’t insulated and you only store dry items with quick trips in and out. When you’re using fiberglass or Rockwool, adding vents is still a smart move.
STEP 2: Measure the Space Between the Studs
Measure the space between studs before cutting the insulation. Label each cut so you don’t play “which piece was this?” later. Cut batts slightly wider than the opening so they friction-fit and don’t sag over time.
STEP 3: Place the Insulation Between the Studs
Place the insulation snugly between the studs so it fits snugly in the cavity without bunching. Don’t compress the batts. Compression lowers the R-value. If you’re using rigid foam board, cut panels to fit, seal edges, and tape seams to block air leaks, not just fill the wall.
STEP 4: Insulate the Shed Ceiling or Roof
The ceiling or roof is where insulation makes the biggest difference. Heat naturally rises, so this is where warmth escapes in winter and where heat builds up in summer.
If your shed has a vented roof, don’t pack insulation tight against the roof sheathing. Leave an air channel between the insulation and the roof so air can move from the lower vents up and out. That airflow helps carry heat away and keeps moisture from settling on the roof.
Use rafter vents or baffles to hold that space open, then place insulation below them so it fits snugly without blocking airflow. If the shed has a flat ceiling, insulate on top of the ceiling instead of the underside of the roof. The goal is always the same: insulation below, airflow above.
STEP 5: Install a Plastic Vapor Barrier
This step is basically adding a thin plastic sheet over the insulation. It keeps damp air from getting into the insulation and is most helpful in cold weather or if you plan to heat the shed. After the insulation is in, hang the plastic over the studs like you’re wrapping the walls.
STEP 6: Cover All the Staples and Openings with Tuck Tape
Now tape everything up. Cover all the staples and openings with tape to maintain the integrity of the vapor barrier. Run tuck tape over the seams, along staple lines, and around any holes or edges. If you leave gaps, air and moisture can sneak through, and that’s when insulation starts acting weird.
Once the plastic is taped, you can cover the walls. Drywall gives a finished look if you want the shed to feel more like a room. Plywood is tougher and makes it easier to hang shelves, hooks, or racks wherever you want. (You can still place shelves, hooks, or racks on drywall as long as you use the studs of the walls.)
Conclusion
Insulating a shed isn’t about chasing perfection. It’s about making the space work better for how you actually use it. When insulation fits right, air gaps are sealed, and ventilation is handled, a shed stops feeling like a temporary box and starts feeling usable year-round. Tools stay drier. Projects are more comfortable. You spend less time fighting the space and more time getting things done.
The other big takeaway is this: insulation only works as well as the shed it’s installed in. A solid structure, proper framing, and smart vent placement make everything easier, whether you’re adding insulation now or later. Starting with a well-built shed saves you time, frustration, and rework down the road.
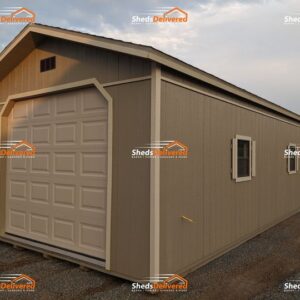
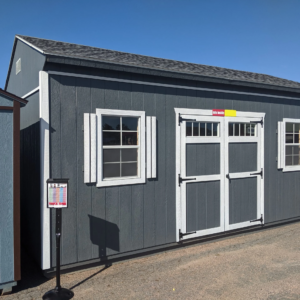
If you’re ready to upgrade your setup or start fresh, shop storage sheds for sale at Sheds Delivered. Their sheds are built to handle Midwest weather, delivered ready to use, and designed with real-world upgrades like insulation, ventilation, and interior finishes in mind. Pick the right shed first, and insulating it becomes a whole lot simpler.